13 June 2025
How to Use Flashing Tape- Step-by-Step Installation for Windows, Roofs & Walls
Learn how to properly install flashing tape on windows, roofs, and walls with this easy step-by-step guide. Prevent water leaks and improve weatherproofing today.
Are you wondering about the usage of flashing tape? Want to know how to use flashing tape the right way? You are right at your destination.
Whether you want to use it to seal windows, patch a roof, or protect wall joints, flashing tape can be your best friend. It is sticky, strong, and keeps water out.
This is not enough. You need to explore more!
Here, we present the flashing tape installation guide to dig into the secrets. Let’s walk through everything from the tools required to the step-by-step application process. We make you flashing tape ready!
Tools and Materials Always Required for Perfect Results
Before you get into the action, gather the gear. Here’s what you need:
- Flashing tape (self-adhesive)
- Utility knife or scissors
- Measuring tape
- Pencil or marker
- Roller or squeegee for pressure sealing
- Primer for rough or dirty surfaces
- Clean cloth or brush
Make sure your surface is dry and clean. Dust, dirt, or moisture can mess up the bond.
Where Can You Use Premium Quality Flashing Tapes?
Window and Door Flashing Tape Installation
Let’s start with the most common use—around windows and doors to keep leaks and drafts away.
1. Prep the Surface
Wipe away any dust or debris. If the frame is rough or damp, use a primer. Let it dry.
2. Measure and Cut
Measure the sides of the window. Cut strips of tape a little longer than needed—extra tape means better coverage.
3. Start from the Bottom
Place the bottom piece of tape first as your drip edge. Stick it firmly, making sure it overlaps the wall slightly.
4. Join the Side Pieces
Apply the side strips, overlapping the bottom piece by a couple of inches. Press it strongly to release any bubbles.
5. Top it Off
Now, stick the top piece, which must overlap the side strips. This way, water runs off and doesn’t sneak into the tape.
Tip to Consider: Use a roller to press the tape down evenly. No air pockets mean no leaks.
On Roof as Roofing Tape – How to Apply It Right
Roofing tape is perfect for sealing around skylights, chimneys, and roof seams. Suppose you want to know – how to apply roofing tape. Here are the simple steps to follow.
1. Clean and Dry
Cleaning the surface is a must. Use a brush to remove dirt and dust.
2. Measure & Cut
Cut the tape to size, ensuring you leave some extra length for overlapping.
3. Stick It On
Peel the backing and press the tape down over the joint. Start in the middle and work your way out.
4. Seal it Tight
With a roller or your hands, press the tape down firmly. Apply extra pressure on the edges.
Expert’s Tip to Follow: Overlap the tape by a few inches if you are covering a wide area or adding another strip.
Fabulous To Sealing Pipe or Deck Penetrations
Have you got a pipe sticking through your wall or deck? Premium quality flashing tape can help seal it up tight.
1. Prepare Around the Pipe
Wipe the area clean and dry. Use a primer if needed.
2. Cut in Strips
Cut the tape into small strips with a slit to fit around the pipe.
3. Wrap Around the Base
Start at the base of the pipe. Wrap the tape around it. Press it onto the surface and up the sides of the pipe.
4. Put in Overlapping Layers
Use extra strips if needed, ensuring they overlap. It is important for a watertight seal.
Tip To Follow: Use a sharp pair of scissors to avoid waste or for precise cutting.
What are the Dos and Don’ts for Best Performance?
Things You Must Do:
- Clean all surfaces first
- Use a roller or squeegee to press the tape down
- Overlap tape sections for better protection
- Store tape in a cool, dry place
Things You Should Not:
- Applying flashing tape on wet or dusty surfaces
- Stretch the tape too much—it may snap back
- Ignore edges—these are weak spots
- Reuse tape—once it is off, it loses stickiness
Well, using or applying flashing tape is not rocket science. All you need to do is apply it right, as we explained. Whether you want to learn how to use flashing tape for windows, roofs, or walls, My Tape Store is there to stretch our helping hand.
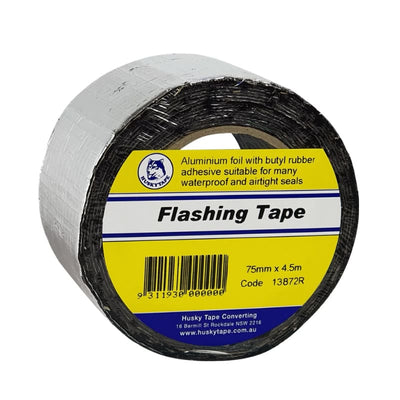
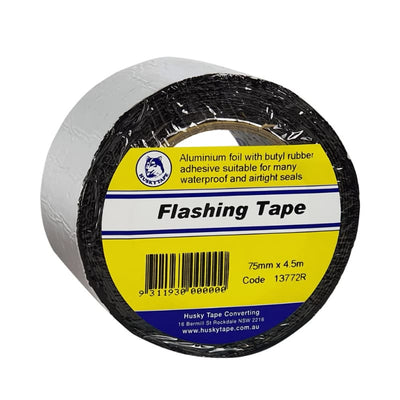
We provide this guide, which is all about clean prep, steady hands, and firm pressure. For enhanced durability and flexibility, you can explore Butyl Waterproof Flashing Tape and for maximum structural strength around window frames, consider using Reinforced Flashing Tape.
After following this installation guide, you are all set to seal up your spaces like a pro. We have unveiled all the secrets and key points to use the tape in the best way and keep leaks at bay. So, now it’s time to make that smart purchase. If you are looking to buy premium quality flashing tape in Australia, get it now at My Tape Store. We are your trusted partner for reliable, long-lasting sealing solutions.
Browse our full range of flashing tapes here. Shop with confidence and convenience today. Your perfect seal is just a click away—order now in any quantity and experience the difference!